You are here: Experiment Guide > Imaging Modes > Contact AFM > Set Up the Experiment

Set Up the Experiment

This step-by-step guide provides the first steps to begin general purpose imaging in Contact Mode. You must be familiar with both Probe Handling and the Stage System before attempting to image a sample.

 
  1. If you have more than one, ensure the correct scanner is installed.
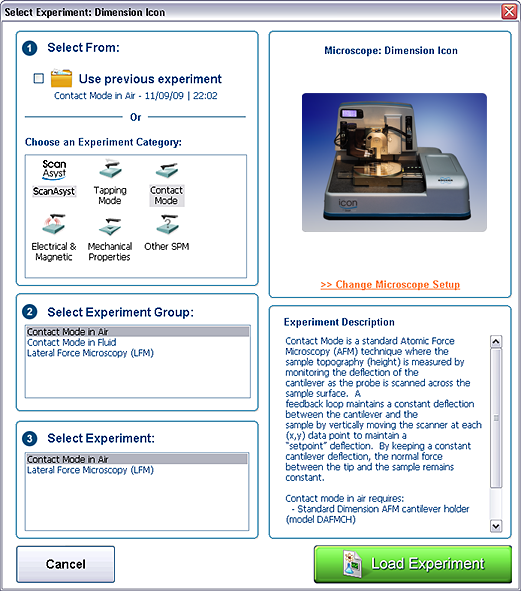
  1. Click the Select Experiment icon. This opens the Select Experiment window:

  1. Select Contact Mode in the Choose an Experiment Category panel.
 
  1. Select Contact Mode in Air in the Select Experiment Group panel.
 
  1. Click Load Experiment. In simple mode configuration, this opens the Workflow Toolbar, the Scan 2 Channels (Dimension Icon) or the Scan 8 Channels (Dimension Icon-PI) windows, and the Scan Parameters List window.
NOTE: The image above shows the single (30 inch) monitor Dimension Icon interface. The dual (19 inch) monitor interface used by the Dimension Icon-PI is slightly different. Refer to Control Station Overview for additional information.

Next Steps:

  1. Scanner, Probe, and Sample Preparation
  2. Locate the Probe Tip
  3. Focus Surface
  4. Check Initial Scan Parameters
  5. Engage and Scan


www.bruker.com Bruker Corporation
www.brukerafmprobes.com 112 Robin Hill Rd.
nanoscaleworld.bruker-axs.com/nanoscaleworld/ Santa Barbara, CA 93117
   
  Customer Support: (800) 873-9750
  Copyright 2010, 2011. All Rights Reserved.